
Control with QGroundControl
Use QGroundControl (QGC) to connect to the simulated BlueROV2, operate its virtual joysticks and watch the forward camera. Complete your installation and prepare terminals A and B before starting.
1. Open QGC in the same Linux environment
Windows/WSL: use the Linux version of QGC. Do not launch the Windows-installed QGC for these tutorials. Start QGC from the same Ubuntu distribution as POSIM, or from inside the same POSIM container when using Docker. WSLg can display the Linux QGC window on the Windows desktop; it is still running inside Linux.
The 127.0.0.1 addresses in this guide refer to the environment where QGC is running. They do not configure a Windows QGC application to receive telemetry or video from WSL or Docker.
| POSIM installation | Where to run QGC |
|---|---|
| Ubuntu native | Install the official Linux application and run it in Ubuntu. |
| Windows with native WSL installation | Install and run the Linux application inside the same Ubuntu distribution. |
| Linux or Windows with Docker | Run the bundled application inside the POSIM container. |
| macOS with Docker and RDP | Run the bundled application from a terminal inside the RDP desktop. |
This guide uses QGC 5.1.5, which is bundled in the POSIM Docker images. For native installations, follow the official installation instructions and download the Linux AppImage for your CPU architecture from the 5.1.5 release. On WSL, run it inside Ubuntu.
In a Docker container, open QGC from terminal B:
qgroundcontrol &
The & returns the command prompt while QGC stays open. If you started the native application in another terminal, leave that terminal open. If the first-launch preferences appear, choose Metric System for the units used in this guide.
This guide keeps QGC, MAVROS and Gazebo together. Telemetry uses UDP 14550 and camera video uses UDP 5600 in the same Linux environment. No extra Docker port publishing is needed for this arrangement. On macOS, only the RDP connection crosses the container boundary.
2. Prepare the virtual joysticks
Open Application Settings → Fly View → Virtual Joystick:
- Enable Virtual Joystick.
- Enable Auto-Center Throttle, so releasing a stick returns its command to the center.
- Leave Left-Handed Mode off for the controls shown here.
3. Configure the camera display
Open Application Settings → Video. Select the video source first, then enter the UDP address and remaining settings below.
| Setting | Value |
|---|---|
| Video Source | UDP h.264 Video Stream |
| UDP URL | 127.0.0.1:5600 |
| Aspect Ratio | 0, to use the camera's ratio automatically |
| Disable Video Stream When Disarmed | Off |
| Low Latency Mode | On |
| Auto-reconnect on stream loss | On |
4. Start BlueROV2 and its camera stream
Close any previous POSIM simulation. In prepared terminal A:
ros2 launch posim_demos posim_robot.launch.py \
  namespace:=bluerov2 world_name:=camera_tutorial \
  x:=3 z:=-94 paused:=false gui:=true headless:=false \
  use_teleop:=false use_web_joystick:=false \
  open_qgc:=false open_virtual_joystick:=false qgc_video:=true
Gazebo opens a seabed scene with objects in front of the robot. QGC should connect to ArduSub automatically. Allow the vehicle to finish initializing.
In prepared terminal B, start sending the camera frames:
gz topic -t /model/bluerov2/camera/enable_streaming \
  -m gz.msgs.Boolean -p 'data: true' --duration 3
Return to Fly View. Click the small video panel to make the camera the main view.
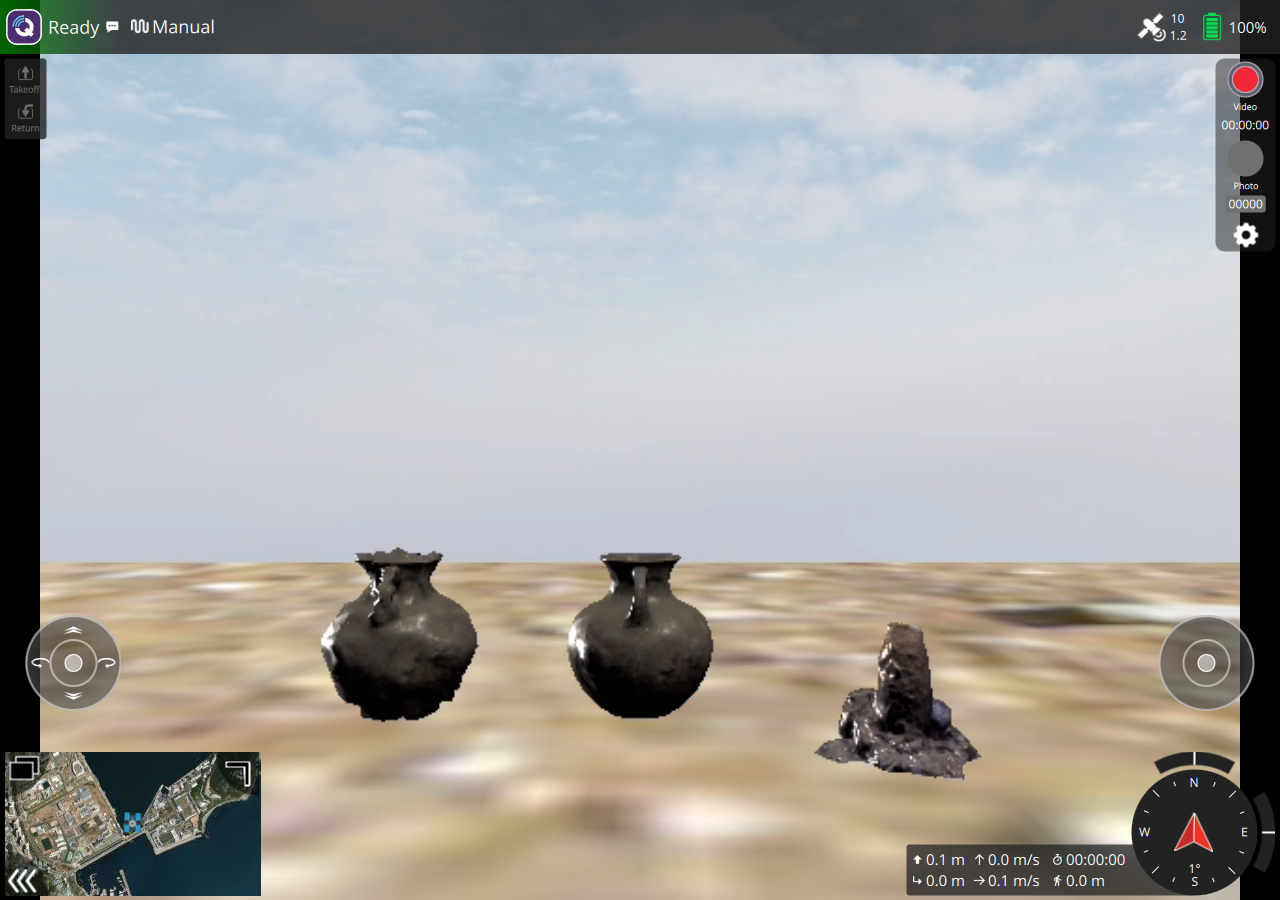
The included camera produces 640 × 480 images at 5 Hz in simulation time. Software rendering can slow the simulation and lower the displayed frame rate. BlueROV2 has positive buoyancy: while unarmed, it can rise and move the objects out of view.
qgc_video:=true adds the H.264 sender for this launch. The stream uses the robot's RGB camera, including the world's underwater scene effects. The separate camera filter publishes its own ROS output. Marine GNSS loses its fix when the antenna submerges and reacquires after surfacing; this does not disconnect telemetry, video or manual control. Use Manual mode underwater. The lens is below the antenna, so it can show underwater imagery while GNSS still has a fix.
5. Arm, move and stop
- Wait for Ready and select Manual mode.
- Open the vehicle status menu and hold Arm until the action completes.
- Move the right stick forward or backward briefly and observe the vehicle and camera.
- Release the stick to return its command to neutral. Water motion and inertia can still move the robot.
- Open the status menu and hold Disarm when finished.
Keep the keyboard and web joystick controllers disabled while using QGC. This avoids sending competing commands.
To stop transmitting video, use terminal B:
gz topic -t /model/bluerov2/camera/enable_streaming \
  -m gz.msgs.Boolean -p 'data: false' --duration 3
Then press Ctrl+C in terminal A to stop the simulation and close QGC.
MAVROS allows up to 60 seconds without a vehicle heartbeat before reporting a lost connection. This accommodates slow software rendering; a real loss of heartbeats can therefore take up to 60 seconds to appear in /mavros/state.
If the connection or video is missing
The qgc_video and qgc_video_port options below apply to the separate launch in step 4. The first-simulation tutorials already include a video sender; use their /tutorial/camera/enable_streaming command. If heavy sonar load causes long gaps between frames, QGC may temporarily show Waiting for video. Keep Low Latency Mode on and try the underwater tutorial without sonar.
- No vehicle: check that QGC runs in the same Linux environment as POSIM and that no second QGC instance is using UDP 14550.
- Waiting for video: check the H.264 source, UDP URL and
qgc_video:=truelaunch option. Start streaming from terminal B, then allow several frames to arrive. - Different video port: launch with
qgc_video_port:=5602and enter127.0.0.1:5602in QGC. Use the same port at both ends. - An older installation has no
qgc_videooption: update POSIM, or pull the current image and recreate the container. - Firmware or serial-port notices: POSIM uses its configured ArduSub build and a network connection. Firmware flashing and serial-port setup are not part of this simulation.
See the official QGC video settings for recording and receiver options. For ROS commands and vehicle interfaces, continue with thrusters and joystick control.