USBL 위치 추정
USBL 예제는 트랜시버 하나와 트랜스폰더 두 개를 연결합니다. 요청을 보내면 위치 응답을 받으며 ID로 대상 트랜스폰더를 선택할 수 있습니다.
튜토리얼 월드 실행
ros2 launch posim_demos posim_world.launch.py \
  world_name:=usbl_tutorial headless:=true
트랜시버와 트랜스폰더가 이미 월드에 포함되어 있습니다. 별도의 usbl 센서 모델을 배치하는 대신 월드 Launch를 사용합니다.
위치 받기
같은 환경의 두 번째 터미널에서 확인합니다.
ros2 topic echo /USBL/transceiver_manufacturer_168/transponder_location \
  posim_interfaces/msg/Location --once
ros2 topic echo /USBL/transceiver_manufacturer_168/transponder_location_cartesian \
  posim_interfaces/msg/Location --once
두 메시지 모두 transponder_id가 있지만 x, y, z의 의미는 다릅니다.
| 출력 | x | y | z |
|---|---|---|---|
transponder_location |
방위각(도) | 거리(m) | 고도각(도) |
transponder_location_cartesian |
상대 x(m) | 상대 y(m) | 상대 z(m) |
현재 구현은 월드 좌표의 위치 차이로 방향을 계산합니다. 로봇 몸체 좌표의 데이터와 결합할 때 이 기준을 반영하세요.
모든 트랜스폰더 요청
ros2 topic pub --once /USBL/transceiver_manufacturer_168/interrogation_mode \
  std_msgs/msg/String "data: 'common'"
ros2 topic pub --once /USBL/common_interrogation_ping \
  std_msgs/msg/String "data: 'ping'"
Common 모드에서는 같은 출력 토픽에 여러 ID가 도착할 수 있습니다. 데이터 연결 로직에서 ID를 유지하세요.
특정 트랜스폰더 선택
ros2 topic pub --once /USBL/transceiver_manufacturer_168/channel_switch \
  std_msgs/msg/String "data: '1'"
ros2 topic pub --once /USBL/transponder_manufacturer_1/individual_interrogation_ping \
  std_msgs/msg/String "data: 'ping'"
채널 전환은 individual 모드를 선택합니다. 채널을 대상 트랜스폰더 ID로 맞춥니다. 전체 요청을 다시 사용하려면 common으로 돌아갑니다.
장치 구성
SDF에서 장치와 요청 방식을 설정합니다. 양쪽 장치의 이름과 ID를 맞추세요.
- 장치:
namespace, 이름·ID, 부착 물체 - 음향: 음속
- 정기 요청:
enable_ping_scheduler,ping_frequency - 튜토리얼 요청 주기: 0.5 Hz
장치나 주기를 변경할 때 튜토리얼 SDF를 참고하세요.
배치와 interrogation 모드
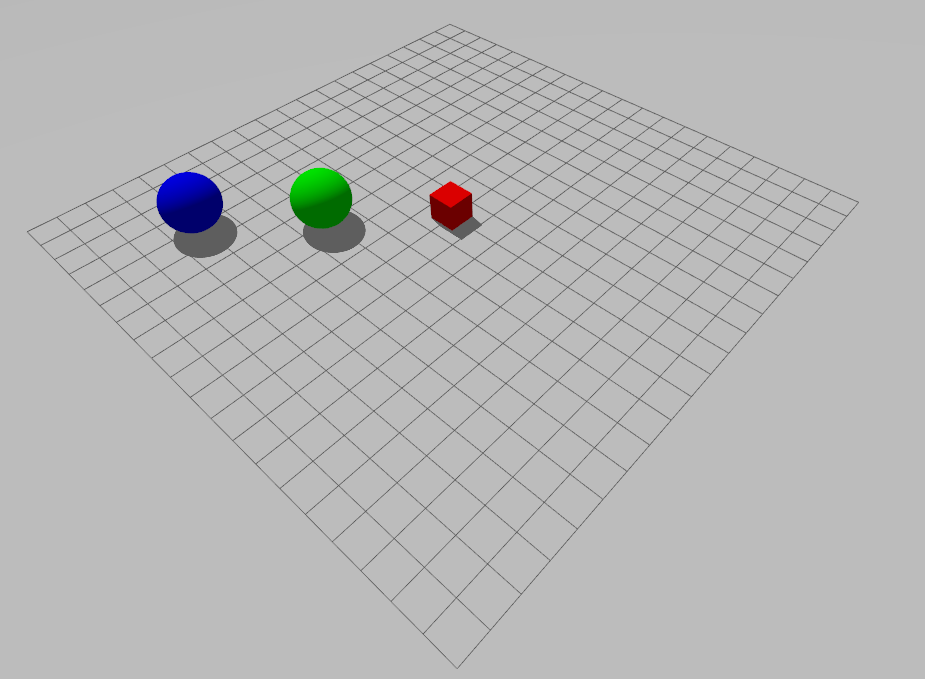
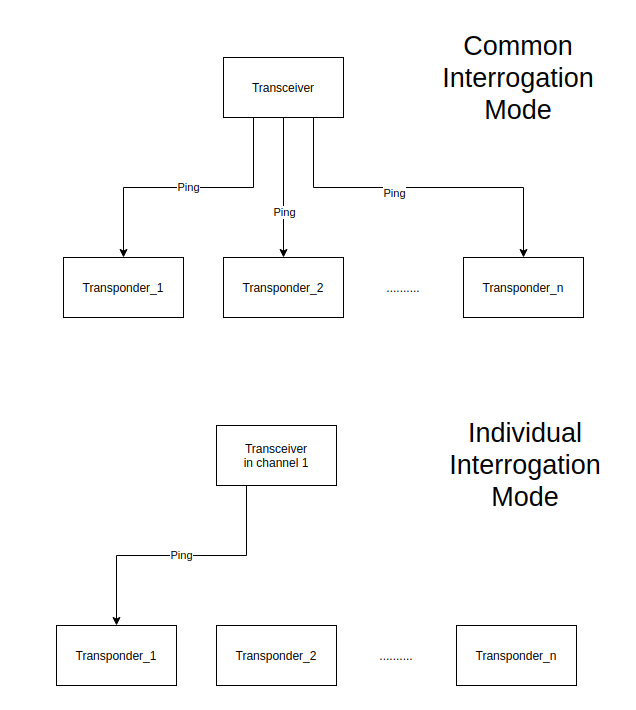
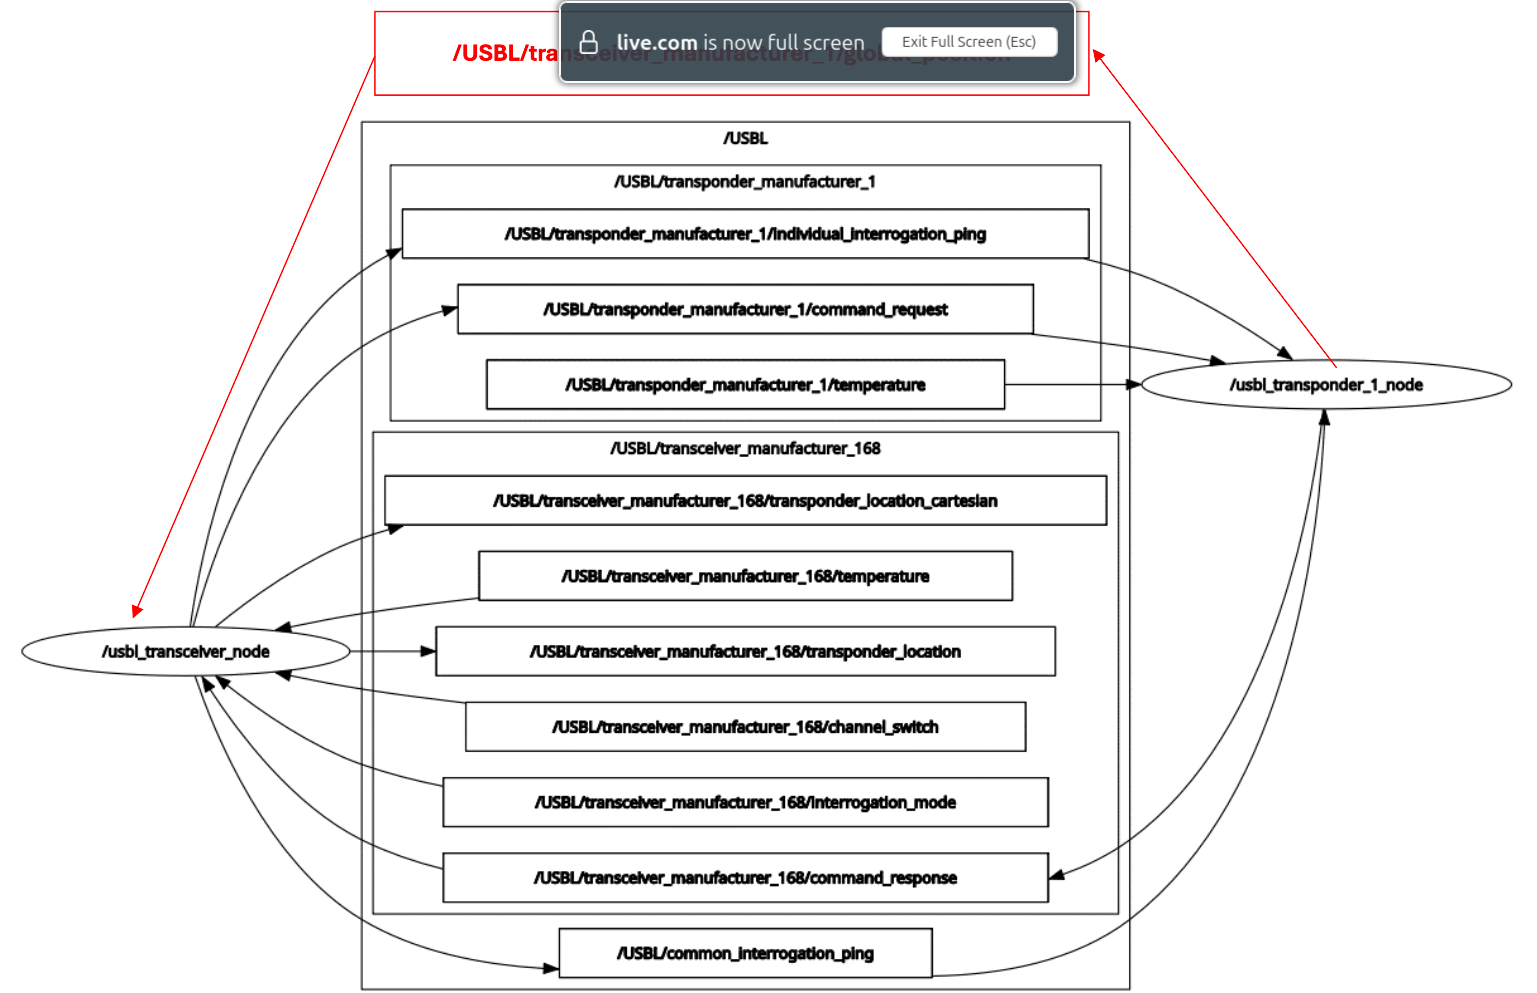
그림·영상 출처: POSIM Notion Wiki. DAVE 문서에서 이어받은 그림의 저자 표시는 인용과 라이선스를 참고하세요. 실행 명령과 토픽 이름은 이 페이지의 코드 블록을 기준으로 사용하세요.